In the early 1980s, it seemed that you could easily identify the efforts of Asian speaker engineers attempting to duplicate high-quality European “golden” samples. Now, decades later, there are only a few almost invisible elements that separate the European speaker components from many of the Asian designs. Still, when trying to capture the qualities of the “golden samples” from Germany, Denmark, Italy, and others — even when using the identical cones and domes — there are subtle differences in sound quality.
There seems to be a lack of consideration and understanding of the acoustical characteristics of the loudspeaker’s many glue joints. The various joints and the effect of the adhesive on the sound quality of these joints will be discussed along with cone and diaphragm coatings.
First, we examine the surround to cone and surround to frame joints. Next, we look at the diaphragm (cone or dome) to the voice coil bobbin. On a cone speaker, this is called the triple joint, where the voice coil bobbin meets the spider’s inner diameter and the cone neck. On a dome tweeter, this is where the dome meets the bobbin. Last, we will consider the acoustical contribution of the adhesive between the frame and the magnet’s top plate.
How can a glue joint influence sound quality? Imagine the glue joint being an acoustical filter—if the glue is gummy rather than hard (e.g., a “rubberized” adhesive), then there will be a partial absorption of the higher frequencies. This is the tan delta or the loss of (sound) energy though a material (in our case the glue joint). Sometimes on a woofer with an untamed midrange peak, this is just what is needed. In other cases, a soft joint will degrade the performance of an otherwise good tweeter design.
As I was preparing this article I came across an excellent explanation of tan delta from Charles Page of PolyOne Corp. in an article on thermoplastics and vibration damping. Page said:
“Because different adhesives and coatings have different molecular structures, they have different vibration damping absorption characteristics, which can be measured with a laboratory test called dynamic mechanical analysis (DMA). Under stress, materials may have both elastic behavior and viscous behavior. DMA is a spectroscopy technique that measures the ratio between the viscous and elastic responses of a viscoelastic material such as a polymer that exhibits both behaviors.
This ratio is reported as the tangent of the phase angle (delta) or “tan delta,” and it corresponds to a material’s vibration damping capability. A higher tan delta peak indicates that a material has a greater ability to absorb and dissipate the energy of vibration at a given temperature.”
Surround to Cone and Surround to Frame
No discussion of the good speaker is complete without attention to the nature of edge resonance and its contribution to response anomalies.
Let’s review the sound energy path through the cone speaker. The vibrational energy is created when an electrical signal is passed though the speaker’s voice coil. The coil is within a magnetic field and the alternating current of the audio signal causes the coil to respond backward and forward in a mechanical analogy to the electrical audio signal.
The voice coil is wound onto a bobbin and the vibrational energy passes up through the bobbin and into the cone. As the energy moves through the cone, it is attenuated (particularly the higher frequencies). Eventually the energy reaches the end of the cone, passes through the adhesive joint between the cone and surround (see Photo 1), and then through the surround. Some energy reaches the glue joint between the surround and the frame and passes into the frame, while some energy reflects back into the surround and back through the joint and into the cone.
Due to the sound energy loss through the various materials, this adds up so that some reflected energy passes back into the cone out of phase and tuned to a narrow frequency band. On a 4” midrange speaker, this might be around 1,200 Hz, while a large woofer may have an edge resonance of 600 Hz.
A major consideration to the edge resonance frequency is the characteristics of the surround. Since this energy is not in phase with the signal passing up the cone, it causes an out-of-phase cancellation resulting in an edge resonance notch in the response. The adhesive joints at the cone/surround and surround/frame are a speaker engineer’s last chance to absorb the edge resonance.... along with various gunk coating treatments on the surround itself.
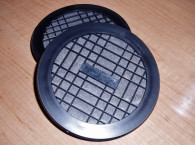
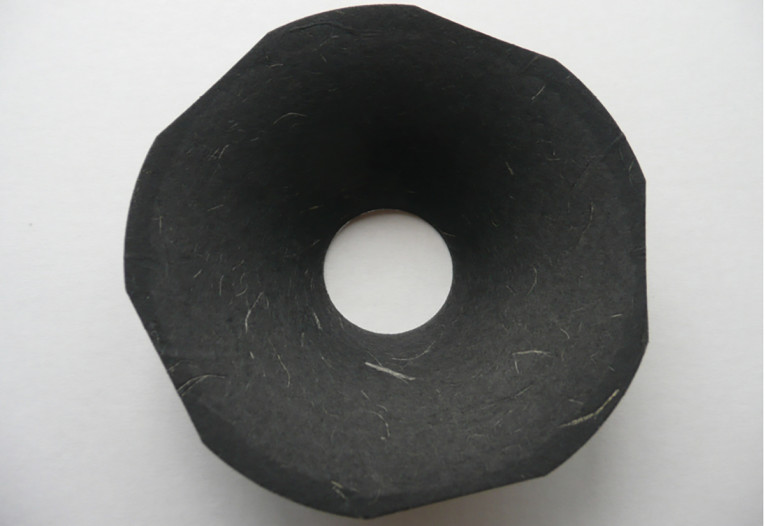
There are several tricks that can be used at the joint between the surround and the cone to minimize edge resonance. One European speaker manufacturer, when trimming the outside diameter of the cone, uses an uneven number of chords, rather than an outer diameter circle. This chord varies the distance between the cone’s inner diameter and the edge, widening the Q of the edge resonance slightly (see Photo 2). A scalloped edge has been used on tweeters and compression drivers with excellent results.
A large overlap between the surround and the cone enables a large glue joint. The large joint, in conjunction with a “gooey” adhesive, increases losses, and improves the strength of the joint. Urethane adhesives, both one and two components, provide good adhesion to the many different cones and surround materials, while providing the high lossiness and reduced edge cancellation results. Especially difficult to bond materials may require the use of an adhesion enhancer or primer before bonding.
Reducing the Cone Problem
We can look at higher frequency behavior in a speaker cone as a “lossy transmission line.” The sound transmission loss of the acoustical signal traveling up the voice coil within the cone is a significant factor in edge resonance. The deader the cone, the more the upper range will be attenuated. You can make the cone more “lossy” by using poly pulp, wool, or latex in the cone paper slurry. Secondary treatments, such as butyl, acrylics or other gummy coatings can be painted or sprayed on the cone. All this assumes you want the woofer’s response to stay out of the midrange.
Reducing the Surround Problem
In two-way speaker system designs, you need the woofer’s response to extend up to (or beyond) the tweeter crossover frequency. Here, you need the surround itself to tame its edge resonance problems. The surround’s contour can minimize reflections. A larger roll will shift the resonance lower in frequency, where the cone material’s absorption will be less, so the energy in the resonance band reaching the surround will be greater.
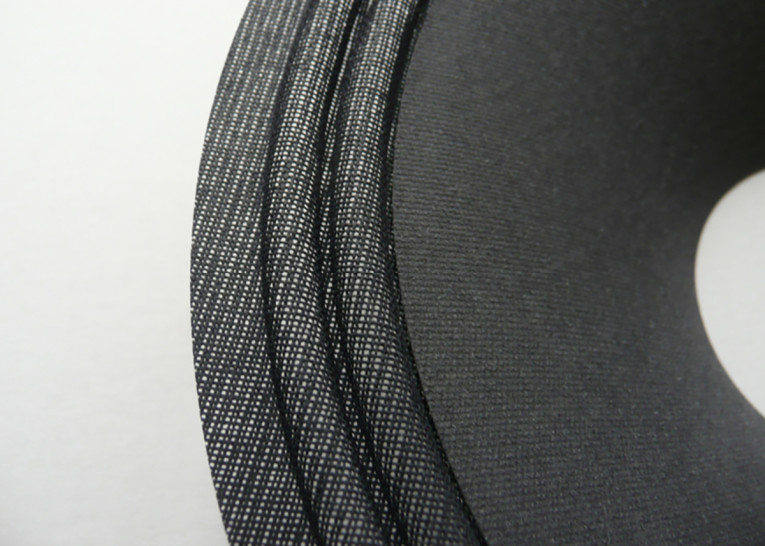
Smaller roll size will move the edge resonance upward, but the speaker’s excursion capability is reduced (see Photo 3). One way around this is the M and the W (accordion) surrounds, where multiple small corrugations are used. I have had my best luck with M surrounds over the years. Although the triple and quadruple cloth edges perform well, they tend to buzz a bit (see Photo 4).

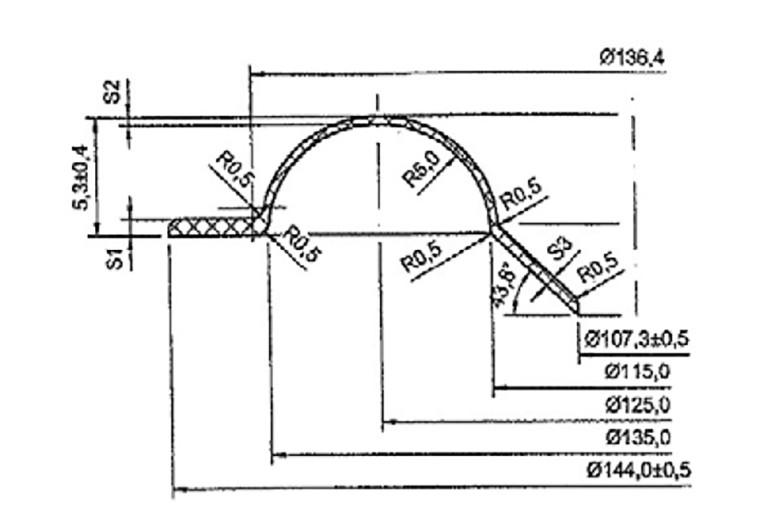
Even using common sense in the selection of the surround’s shape can be helpful. Instead of sharp transitions between the roll and the surround attach, using a larger radius (see Figure 1 and Figure 2) can improve the sound. Then, there is the surround material itself. Cotton and poly cotton with an elastomer coating is common, so are polyether and polyester foams. Butyl rubber has good lossy characteristics, but often rubber surrounds are too costly and too heavy. Santoprene is lighter and less expensive, but its lossy characteristics do not match that of butyl rubber.

The Triple Joint
We can also try to reduce the problem (e.g., peak rise in the upper midrange) at the neck joint. If too much high frequency energy is reaching the surround, you can filter it out before it gets to the cone. If the speaker is used with an electric guitar and the cone bending (cone cry) is a desired signature, then a hard joint may be desirable. If an extended range speaker with smooth off-axis response is what you want, then try a soft adhesive at the neck to decouple the midrange from the cone in conjunction with a curvilinear (curved cone body) profile and mount the dust cap directly to the bobbin for extended top-end.
The spider’s sound radiation does not usually get much attention. But if you want to get an idea of what the spider is doing, try building up the speaker without the cone or the dust cap. Compare the coneless speaker’s response and sensitivity to that of the complete speaker, and you will realize how much the spider contributes (or detracts from) the speaker’s sound quality.
The spider’s output can create comb filter anomalies in the speaker’s midrange response. This is sometimes the “mystery” variable in a speaker’s response during mass production. Fibers (e.g., cotton) tend to absorb more resin in the dry season and less resin when there is high humidity. Teijin’s Conex is a superior solution for spiders, delivering both longer life and lower distortion but it is costly. The spiders that attain their stiffness with stronger fibers and appropriate fabric weave rather than those loaded up with phenolic make less noise, by the way.
Alternatively, a secondary bead of urethane adhesive at both the neck joint and the spider’s periphery will reduce its radiation and also reduce the likelihood of the spider fibers fracturing where a rigid epoxy has wicked. For this application, a two-part urethane might be a good choice.
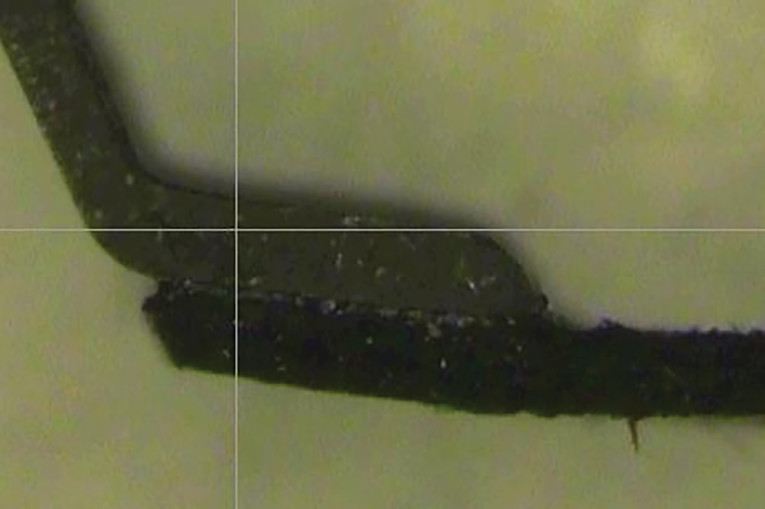
We have already discussed that the neck joint is one of the most critical junctures for the speaker’s mechanical integrity (see Photo 5). Consider the concentration of forces at this point, especially if the voice coil diameter is small and the excursion high. The joints between the spider, the cone apex, and the bobbin will all apply shear, peel, and mixed loading to this bonded joint. If the bobbin is aluminum, then the adhesive must also have high thermal tolerance. Since this joint is directly in line with the voice coil bobbin, impulsive transients will also test its shock strength.
Add to this process control considerations (e.g., cure time, getting the bead of adhesive to stay where it’s put without dripping down onto the voice coil or wicking into the spider fabric only to have the fibers fracture in the field, etc.). You are not likely to find one adhesive that has all the characteristics you want, so why not consider using two adhesives? On woofers where reliability and sound quality are the foremost issues, you might consider the use of an epoxy adhesive on the main joint and an additional outer coat or bead of urethane for damping.

Tweeter Patrol
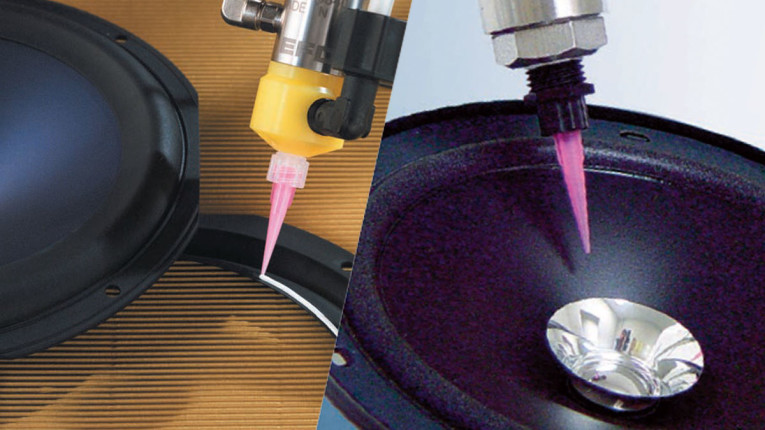
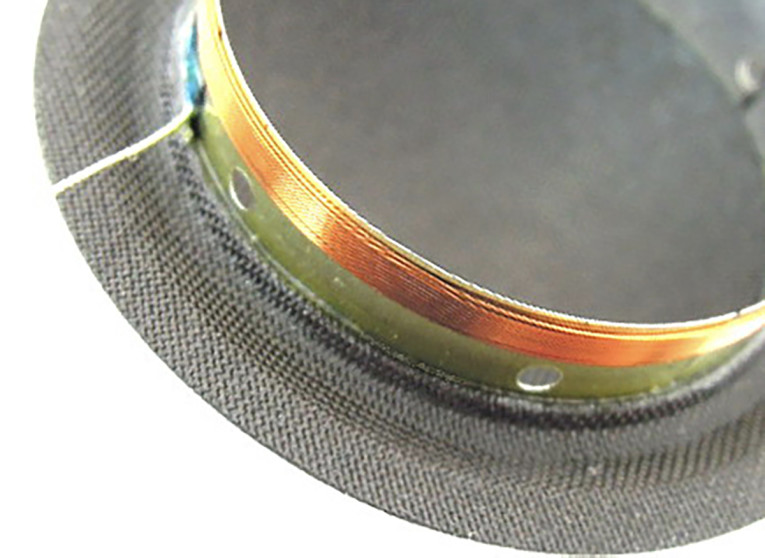
The tweeter bobbin to diaphragm joint offers its own set of challenges (see Photo 6). The moving mass of a tweeter diaphragm is so small that the adhesive’s mass becomes a significant variable. Precision adhesive dispensers are mandatory. Even the usual automated dispensers commonly found at most speaker factories are marginal when it comes to absolute uniformity.
Positive volume displacement pumps and precision valves are critical pieces of equipment when it comes to accurate and repeatable dispensing of the bobbin-to-diaphragm adhesive. Medical grade valves (e.g., FMI) are an example of high-precision dispensing. The same adhesive bead should be dispensed whether the factory temperature is cold or hot (which can affect adhesive viscosity and in some dispense valve the mass of the joint), whether the adhesive is fresh or has been sitting out for hours, and whether the dispenser is full or almost empty.
Another factor not often considered is the adhesive’s solids content and the even dispersion of these solids within the solvent. When the adhesive is dispensed, the solvents blow off leaving the solids. And even if a consistent volume of adhesive is dispensed, if the solids content varies, so will the glue joint on the tweeter. But even with the perfect dispenser, the right adhesive characteristics are still critical.
Manufacturers’ that still use rubber modified epoxies and other solvent-based adhesives are struggling to reach 20 kHz with their tweeters — and are not likely to get there. A thick, soft, and uneven adhesive joint between the bobbin and dome is not the path to extended and uniform top-end response.
What most leading speaker manufacturers have learned is that the adhesive joint between the dome and bobbin must be a thin hard film, such as a cyanoacrylate (CA) or acrylic. A low viscosity adhesive goes on thin, has minimal mass, and so unit-to-unit variations and high-frequency losses are insignificant. CAs can be tricky to work with in high humidity environments. While there are several ways to control the humidity in the area of the joint, you still must also keep the surface moisture of the parts low. Expiration and shelf life of CAs can also be a problem.
Application of Urethane Adhesives and Resins
Many years ago, I heard Raymond Cooke, founder of KEF, the famous British loudspeaker company, talk about the importance of isolating the resonances of the speaker driver (e.g., the frame, etc.) from the enclosure’s baffle. He said once the frame/magnetic structure resonances got into the baffle, the sonic damage was done. The large radiating surface of the baffle would soon dump the resonances into the listening room.
A similar situation exists within the woofer itself. Most woofers use a stamped steel frame and these can suffer from “bell” resonances. To control and isolate the woofer’s structural resonances, urethanes can be used to bond the magnetic structure and frame. The urethane’s lossy characteristics will help absorb some of the unwanted resonance in the frame. This approach is very common in European-built woofers.
Conclusions
In summary, if the speaker designer needs to tame an upper midrange peak some remedy can be achieved by using a lossy (damped) adhesive. In a cone driver, this adhesive (perhaps a rubber modified epoxy) could be used to attach the dust cap to the cone, and/or some additional upper mid-range attenuation from the glue or materials at the triple joint (junction of the cone, spider and voice coil).
With tweeters or compression drivers, where sound transmission at the top-end through the adhesive joint must be preserved, a low-viscosity adhesive that cures to a hard thin joint can be beneficial as it will not absorb the higher frequencies passing through it. Thick joints in tweeters are rarely a good idea as they can result in sloppy parts placement if proper jigging is not used, not to mention too much mass.
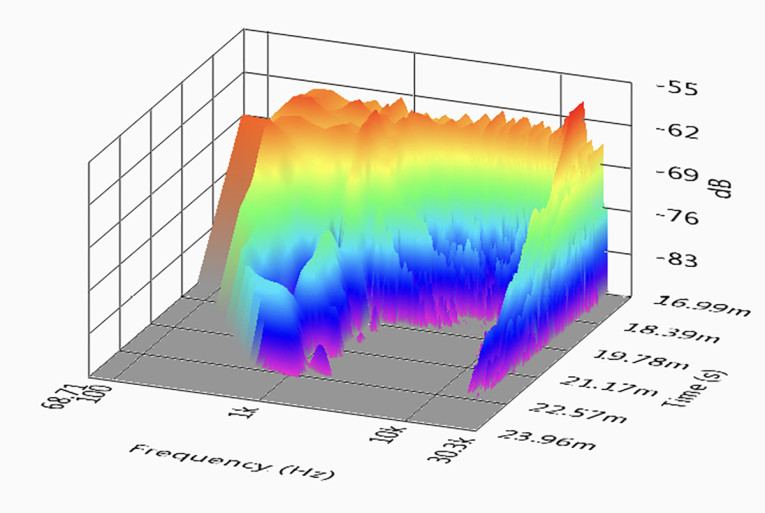
Proper selection of adhesive not only provides mechanical integrity to the speaker design but can also help to tame many acoustical issues. While all this adhesive wisdom is hopefully useful, the use of simulation tools for cone design (e.g., Loudsoft's FINECone) and time-frequency analysis tools (e.g., Listen Inc.’s SoundMap) provide powerful adjuncts to achieving design goals (see Photo 7). VC
This article was originally published in Voice Coil, July 2017.